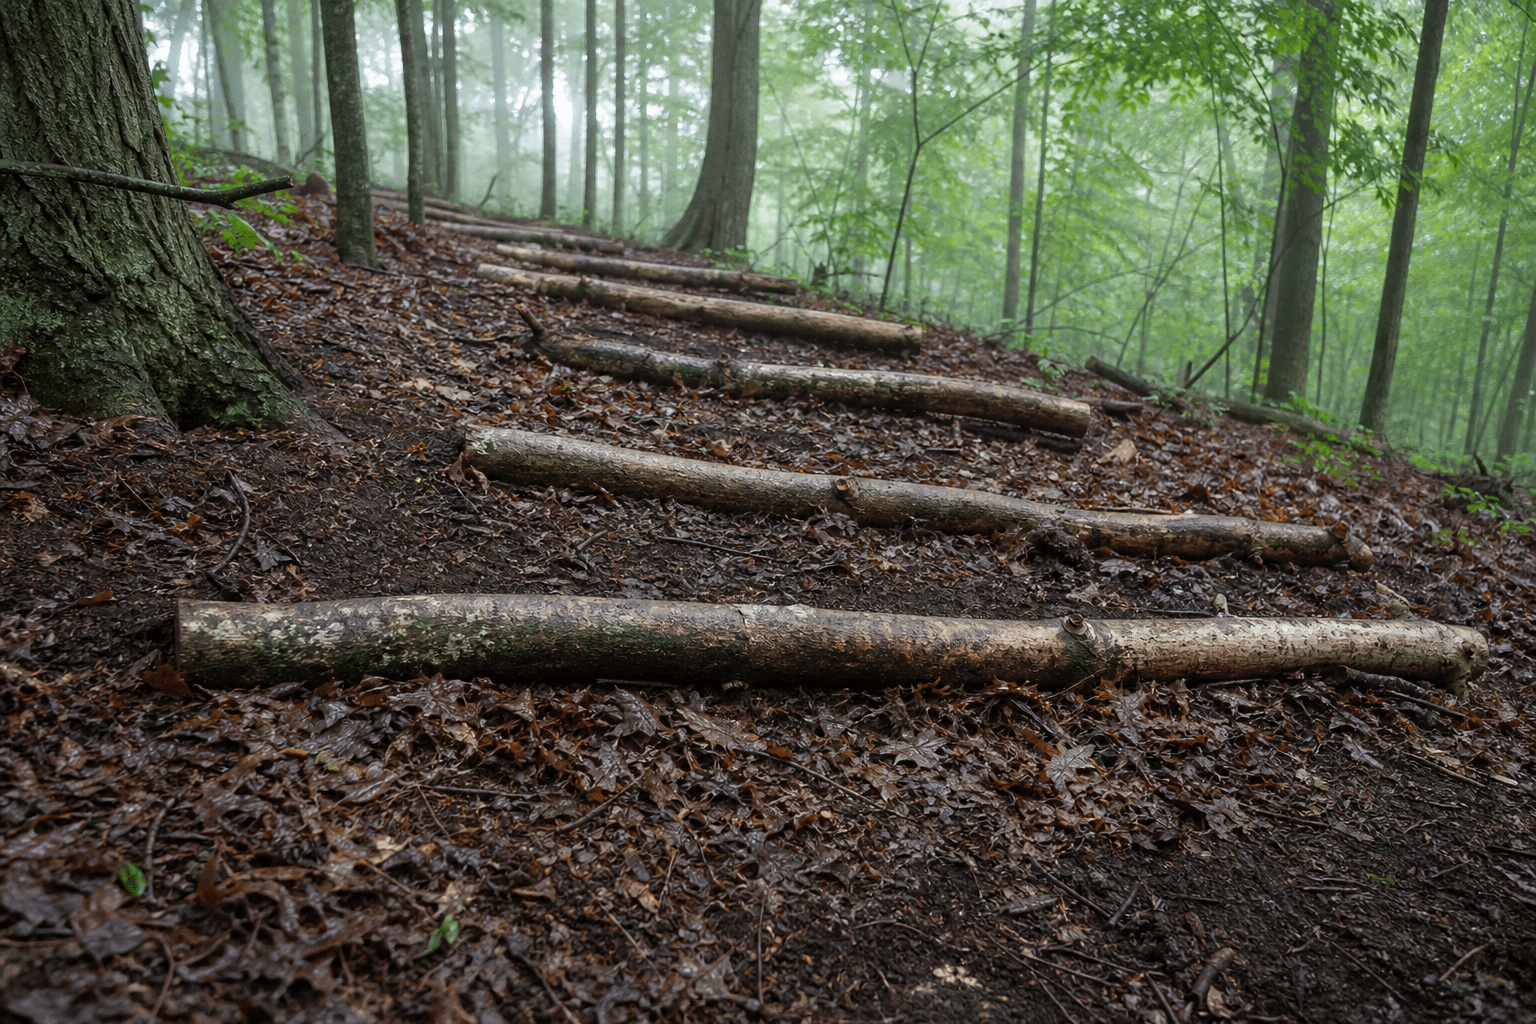
After a hard rain on a wooded slope, you see the problem before you see the fix: leaf litter and fine sticks washed into the drainage line, soil exposed at the toe of the grade, and a shallow channel forming where water found the path of least resistance.
On the Wesley Stump Family Foundation restoration property in Strongsville, we are testing a natural approach that forestry and conservation agencies have used for decades — log erosion barriers placed crosswise along the contour, perpendicular to downhill flow.
This is not new science. Agencies including the USDA Natural Resources Conservation Service document the practice as contour log felling, log terraces, or terracettes. The idea is simple: shorten the slope length, add roughness, slow water down, and give sediment and organic debris a place to settle before it washes away.
Why crosswise matters
Water on a grade does not care about your plans. It runs downhill. A log placed parallel to the slope does little. A log placed across the slope — on the contour line — acts like a low dam.
Research on contour felling shows that alignment matters. Logs placed more than a few degrees off contour lose a large share of their trapping efficiency. Before you set a single stick, find the contour: use a line level, a carpenter's level on a long board, or at minimum walk the slope and mark where water would run sideways instead of straight down.
Working with a six-inch log
A six-inch-diameter hardwood log is a practical size for hand work on a private woodland lot. It is heavy enough to stay put, light enough for two people to move, and common among fallen maples and oaks after wind or selective cleanup.
Typical specs from conservation guides: barriers often use logs in the 6–12 inch range, cut to lengths you can safely handle — often 4 to 10 feet on a small site, longer on open ground.
Step-by-step placement
- Mark the contour across the problem slope. Repeat uphill every 10 to 25 feet depending on steepness (steeper = tighter spacing).
- Dig a shallow trench on the uphill side of the log line — about 2 to 6 inches deep for a small log, enough to seat the wood so water cannot run underneath.
- Lay the log crosswise, perpendicular to flow. Strip small branches so the trunk sits flat and makes contact with the ground along its length.
- Tamp soil into the gap on the uphill side. Pack duff and mineral soil under the belly of the log. The goal is no bypass channel beneath it.
- Anchor the downhill side so the log cannot roll — stake through the log, pin to a stump left 10–12 inches high, or wedge against a second log.
- Leave controlled gaps if you need overflow during very heavy rain. A semi-continuous row works better than one isolated stick in the middle of a long grade.
On a moderate Ohio woodland slope, think of each six-inch log as one link in a chain, not a single magic fix.
What this catches besides soil
Log barriers are especially useful where leaves, twigs, and forest duff keep washing out. Those materials are not waste — they are future mulch and soil organic matter. When a crosswise log slows the water:
- Fine sticks lodge behind the barrier
- Leaf packs stack and begin to decompose
- Sediment drops out of slower water instead of heading to the creek or storm drain
That trapped material then feeds fungi, holds moisture, and helps vegetation re-establish above and below the barrier — which is the long-term answer anyway.
Spacing guide for small slopes
| Slope | Suggested spacing between contour rows |
|---|---|
| Gentle (under 15%) | 20–30 feet |
| Moderate (15–30%) | 12–20 feet |
| Steep (30%+) | 8–15 feet |
On our 25-foot hillside near the trail work described in Trail Slope Access Improvements, we are pairing contour logs with existing trail edging and hand-built retaining wood — same material, two jobs: access and erosion control.
Where not to use them
Do not lay log barriers inside concentrated flow channels, swales, or active drainage easements where water already gathers volume. High-velocity flow can blow them out. In those areas, shape the channel, protect banks with live vegetation, or use designed drainage — like the historic canal channel work covered in our drainage permit article.
Also avoid logs that are rotted hollow, root-ball unstable, or still attached to compromised standing trees.
How this fits the larger site plan
This practice connects directly to Ground stewardship and Safety work on sloped land. It uses material already on site from dead and fallen wood management, costs little beyond labor, and buys time while roots, ferns, and groundcover stabilize the surface.
Log erosion barriers are usually a short- to medium-term tool — often one to two seasons of strong benefit while permanent vegetation returns. The logs themselves eventually decay into the very soil they helped protect.
Quick field checklist
- Contour marked; log runs crosswise, not downhill
- Shallow trench; no water path under the log
- Uphill side packed with soil and duff
- Log anchored against rolling
- Not placed in a high-velocity drainage throat
- Next row uphill within spacing for your slope grade
If you have a six-inch maple or oak on the ground after storm cleanup, you already have the right material. The work is placement, not purchase.